

When your (not so) wee one starts losing his or her baby teeth, it’s a big deal. It’s a big deal to them and it’s a big deal to parents. Losing baby teeth is symbolic of big change. They are growing up.
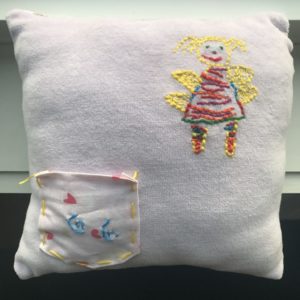
I found this craft in a book called ‘The Creative Family”. It is such a great idea. A project you work on together with your child. Your child draws the tooth fairy and you embroider the drawing onto the fabric they choose for their pillow. They sew their name or initials onto the pocket that holds the tooth, as well as sew the pocket onto the pillow. (All 3 of my kids chose differently for their pockets – one chose their initials, one chose their full name and one chose their nickname.)
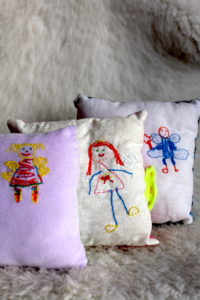
I love seeing each of my children’s personality come through in their portrayal of the tooth fairy. This project is well worth the effort. But, start early. I started the sewing of my last child’s a little too late, and ended up racing against a loose tooth to get it finished (which, also coincided with the week before Christmas). In general, the teeth start falling out around 6 years of age. So, sometime after their 5th birthday is a great time to get started.
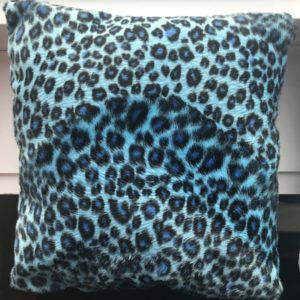
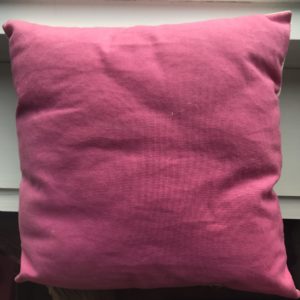
Go to a fabric store or department store (Walmart) and let your child pick out a 10″ square piece of fabric for the front, back and pocket. We sometimes used fabric around the house, too (I keep a basket of old clothes/recycled fabrics for crafts). Keep in mind for the front of the pillow, the fabric should be clear of pattern so the tooth fairy stands out well. My youngest chose two fabrics for the back, so I first sewed them together to form the 10″ piece.

You can order 100% cotton embroidery thread and needles online or go to your local fabric/department stores (you could also order the fabric online). (I love online shopping – I try to order as much online as possible!) Don’t use a too shiny or dull of embroidery thread. Both are more difficult to work with. (I just checked the brands I have and they are called ‘Friends Forever’ so stay away from that brand.) The brand I have that is in-between shiny and dull, is called J & P Coats. You will need a variety of colours so you can match the colours your child chooses for their tooth fairy.
Before I list what you will need to get started, try to remember there are no rules. I’m not giving you a template because all you need to do is measure out a square or any size you want (remember, if you want an 8″ pillow then you need to measure out fabric of 9″ to allow for fabric loss after you sew). Your pillow can be any shape you want, as can your pocket.
WHAT YOU NEED:
• embroidery thread
• embroidery needle
• embroidery hoop
• 2 pieces of 10″ cotton (or whatever size you want to make your pillow)
• scissors
• fabric coloured pencil or regular lead pencil
• sewing machine (I use this to sew the edges of the pillow, but you or your child could do it by hand)
• stuffing (I used wool stuffing, but cotton or anything you prefer would work)
• the author suggests dried lavender or anything else to scent the pillow (I didn’t try this but it’s a great idea)

TIP I never showed my 5 year old the pillow his/her sibling created until after their tooth fairy was created on paper, so that it came from their own imagination.


MAKING YOUR PILLOW:
• Get your child to draw the tooth fairy on a piece of white paper, using coloured pencil crayons or markers.
• Take a trip the a fabric store with your child and let your child choose fabric for the front and back of the pillow, as well as the pocket.
• Cut your fabric to the size you wish (I did 10″ square, one I did a bit smaller I think)
• Tape the drawing to a window on a sunny day. Tape the front of the pillow fabric over the drawing. Trace the drawing, lightly, with the fabric or lead pencil (dark fabrics may need white fabric pencil)
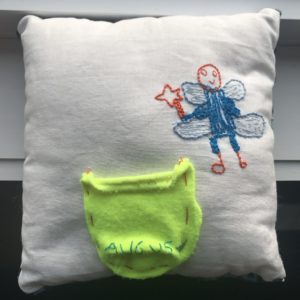
• Place the pillow front fabric in the embroidery hoop and embroider the drawing, matching the colours and line depths as much as possible. (You will notice in my son’s tooth fairy drawing the lines I used inside the wings are much thinner than the lines for the rest of the body. That is how his drawing appeared. I tried to match it exactly. You may not carry that obsessive characteristic inside of you and if you don’t, hurray for you as this project will take you way less time than it took me.)
• Cut out the pocket. I cut ours approx 3″ high and 3″ wide. I cut a rounded edge along the bottom (see photos). Again, sorry, no template, just wing it. It could be square if that’s easier; or, do it like a denim jean back pocket. I folded the edge along the sides and bottom approx 1/4″ and ironed it flat. Gives a nice clean edge and stops any fraying from starting.
• Have your child embroider his or her name onto the pocket (google stitches for kids, but the back stitch or straight stitch are likely best options.) My kids used an embroidery hoop with a blunt needle and practiced sewing onto burlap (has holes in the fabric so is very easy) prior to sewing on their pocket. (Photos and more details in The Creative Family book.)
• Place the two pillow fabric pieces FRONT TO FRONT. So, the tooth fairy embroidery and the outer side of the back fabric are touching, face to face (see photo above). Then, pin it along the edges. Sew approx 1/2″ from the edge all along the pillow, leaving a 2″ gap.
• Turn the pillow right side out, have your child stuff the pillow.
• You or your child sew by hand (google a stitch, if necessary) the 2″ hole.
Your pillow is now complete! Your child will put it on his or her bed with the tooth in the pocket. In the morning the tooth will be gone (or placed in a tooth box, doll or bag that the tooth fairy sometimes brings) and money or seeds for a garden (symbolic of growth) or whatever the tooth fairy leaves, will be in the pocket of the pillow.
Enjoy creating this treasure together and the time spent with your child – keepsakes for life.
![]()


